Run SQL Server on macOS + Docker
Intro
If you haven't seen Microsoft's latest Docs site update, you really should check them out. There is a getting started article regarding SQL Server (2017) Containers on Linux and other OSs including Azure. The SQL Server 2019 version article is also available. This post will go over the detailed steps on setting up a locally running SQL Server (2017) instance on your macOS.
Step 1: Installing Docker
(If you have Docker already installed skip to step 2)
Hopefully, you have a working knowledge of Docker. If you don't, let's walk through the steps of setting up a Docker Desktop for Mac. Download the install from the Docker Store.
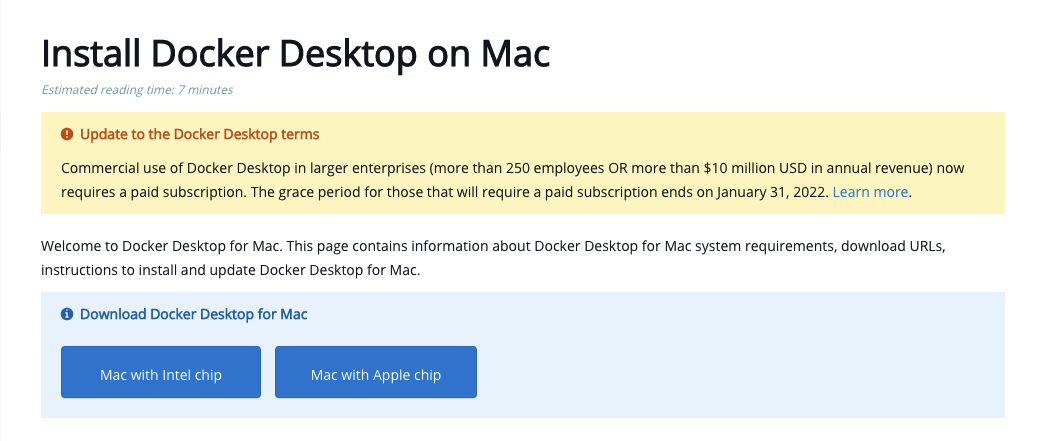
Based on your chip either Intel or Apple M, download the appropriate .dmg file. Once downloaded, start the .dmg file and drop the file into your Applications folder to install it.
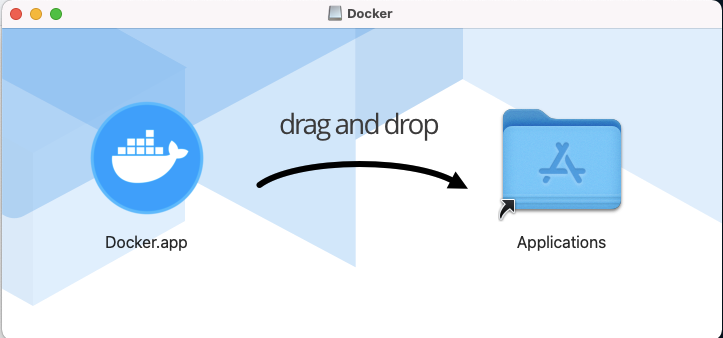
Start Docker from your Application folder. You may need to enter your password for elevated privileges. Accept the Service Agreement to continue.
Configure Docker Preferences
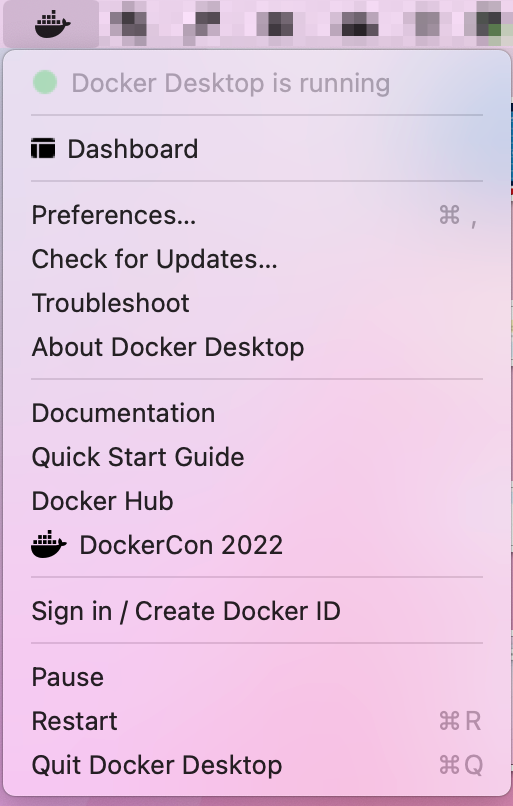
Once Docker is running you'll see the while icon in your toolbar.
Microsoft's original article I linked in the intro specifies system preferences as the following:
- Docker Engine 1.8+
- Minimum of 2 GB of disk space
- (Common sense sense says you'll disk space will increase with the size of your DB.....)
- Minimum of 2 GB of RAM
- (I prefer to extend to 4GB if you'll be using this heavily in testing and supporting other local apps)
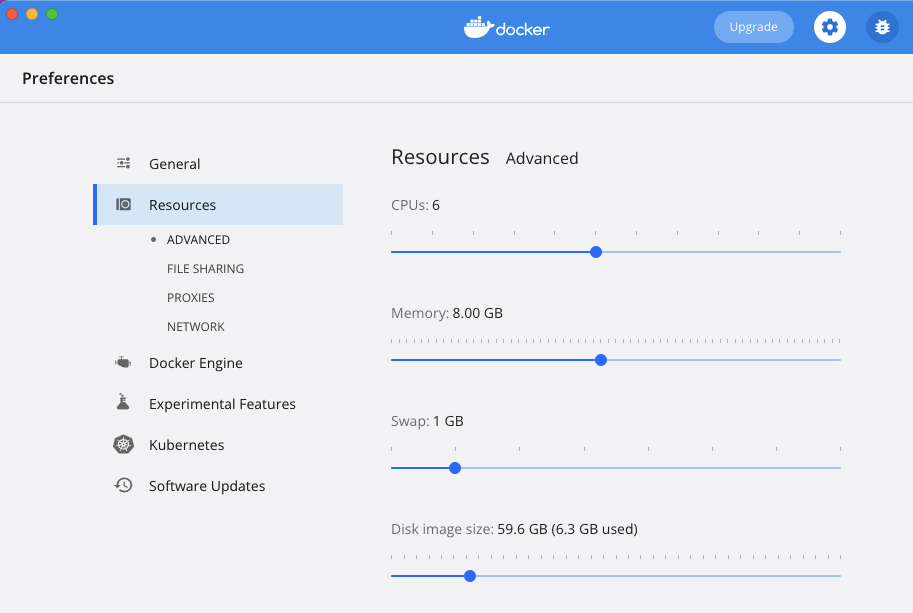
FYI: Any system resource changes will require a Docker Restart.
Step 2: Setup the SQL Container
At this point, Docker is installed. If it isn't running already, double click the Docker App Icon in the Applications folder.
You will see the Docker whale icon in the toolbar. Click on the whale icon and open the dashboard. A fresh install will have no containers listed. The green box in the bottom right will indicate your Docker engine is running.
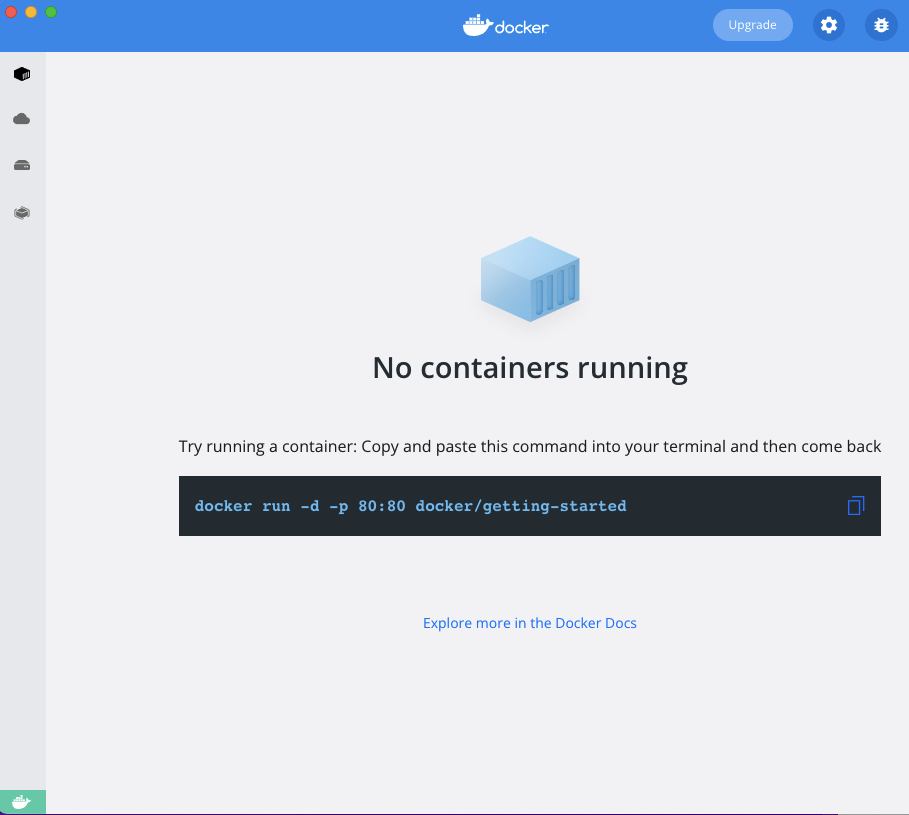
With Docker running, let's open a terminal window to execute the next series of commands.
We will pull down the SQL Server container image from the Docker Hub with the following command:
# pull image

docker pull mcr.microsoft.com/mssql/server:2017-latest
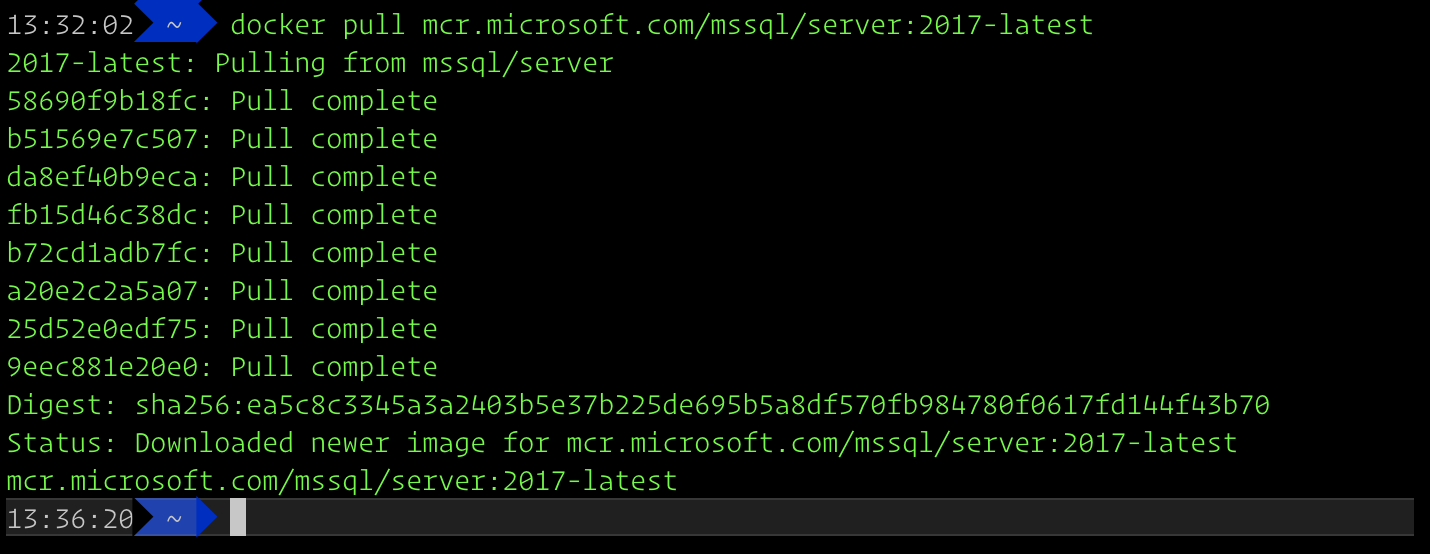
Now we need to run the container to set up the SQL Server instance.
Remember the back slashes below indicate a new line or else you can just type this all on one line without the backslashes.
sudo docker run -e 'ACCEPT_EULA=Y' -e 'SA_PASSWORD=MyPassword1' \
   -p 1433:1433 --name LocalSqlServer \
   -d mcr.microsoft.com/mssql/server:2017-latest
The command above uses the following flags:
| Parameter | Description |
| -e | Environment variables for the Docker Container: (1) End user licensing agreement, (2) specify SA Password (REMEMBER THIS!) |
| -p | Docker host port number (first) and Docker exposed port number (second) |
| --name | Specify the name of the Docker container. This must be a unique name for each container Docker is running. |
| -d | Executing the SQL 2017 image |
The command will now run the SQL Server container. Your Docker dashboard will now list the new container with the name you specified in the --name flag.
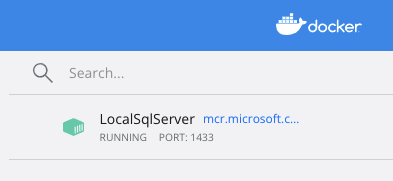
From your terminal, the command docker container ls will list the containers in your Docker instance. You can see that the name you specified in the command statement is now listed in your terminal as well..

Step 3: Connecting to SQL Server
The database container has been created but we need to get into the container and create our new database.
Connect via Command Line
Connect to the container:
docker exec -it LocalSqlServer "bash"
Once in the container, you'll have a :/# prompt.
Now we can connect to the SQL Instance:
/opt/mssql-tools/bin/sqlcmd -S localhost -U SA -P 'MyPassword1'
You can leave out the -P flag and you will be prompted for the password. Once connected to the SQL instance, you will now have the 1> prompt. A simple SELECT 1+1 will return the following:
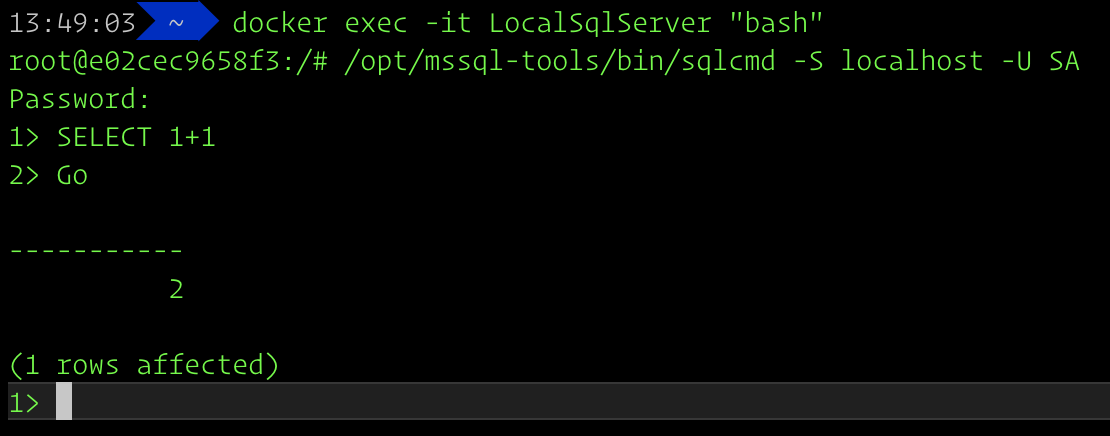
A simple script in the SQLCMD prompt can be tested with the prompt above.
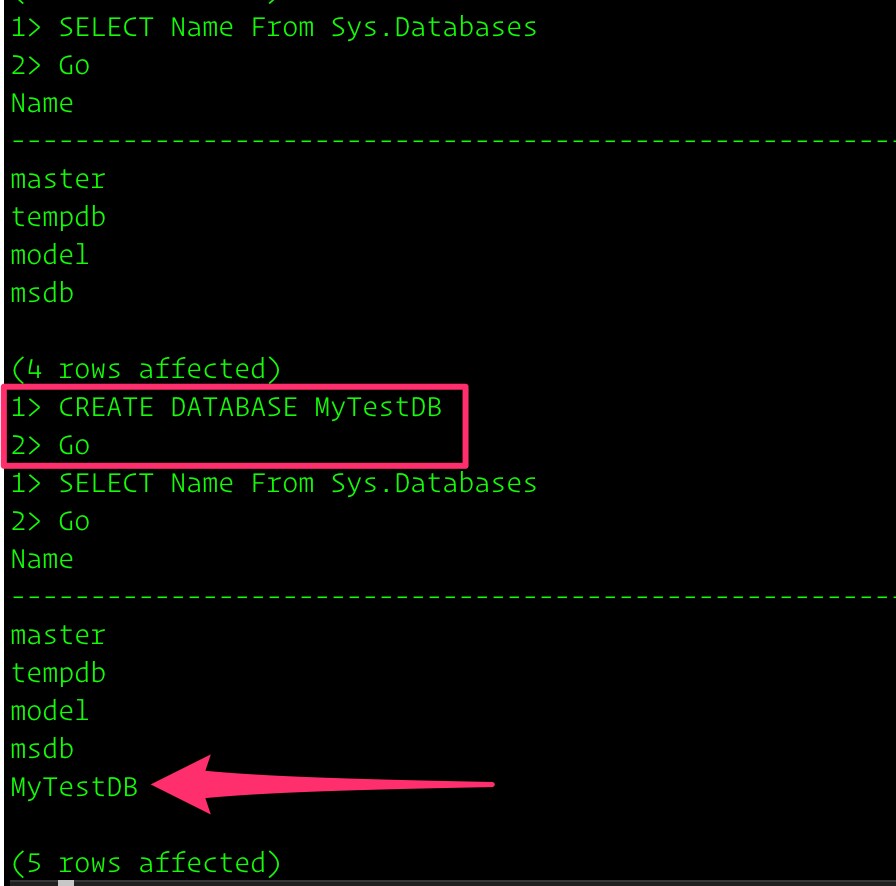
From within the SQLCMD prompt, you can feed any T-SQL statement followed by the GO statement to run the command.
Next steps are to list existing databases. You will see the default SQL Server databases. We'll create a new DB and than show the newly create MyTestDB show in the database list.
Connect Using Azure Data Studio
You can download Azure Data Studio for macOS to connect to your new SQL Server Database.
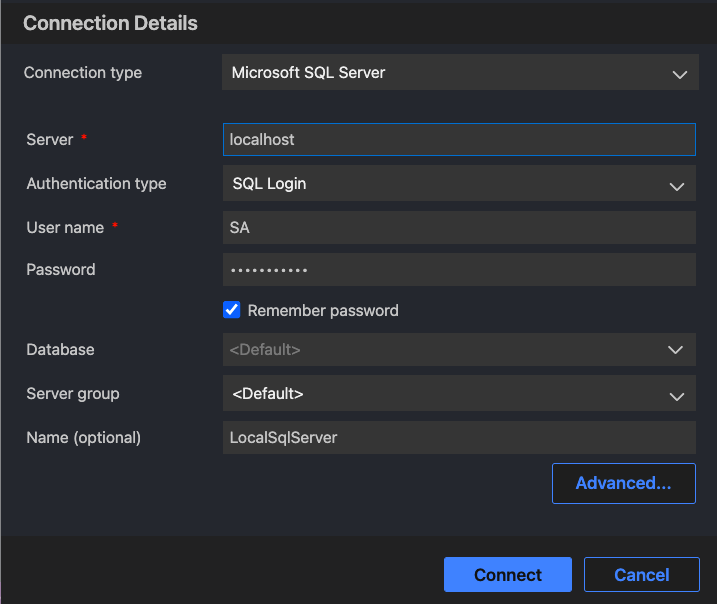
Enter the information below, localhost as your server. Use SA as your login until you get a new user created and use the default password specified earlier.
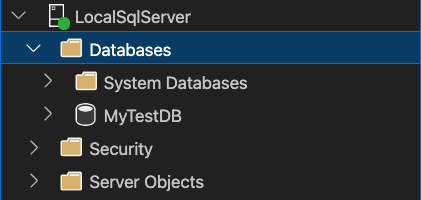
You now have a GUI to now interact with, you see our new DB listed below.
Start and stop the Docker container as you please, when you want to work with SQL Server on your Mac!
End
If you followed along with this walkthrough, you:
- Downloaded and Setup Docker Desktop for Mac
- Pulled the SQL Server 2017 Image
- Ran and initialized a new SQL Server Database Instance
- Connected to the new Docker container and SQL Server Command Prompt to interact with the SQL Server Database
Reference Links
About the author
Full Stack Data Dev.
Comments
Join the discussionNo comments yet. Be the first to comment.