.NET Web API - Getting Started
Full Stack Data Dev.
Introduction
This article is the start of a series on how to build an API using the .NET Framework. I'm sticking with .NET 6, it is the latest Long-Term-Support (LTS) Version.
I'll be using Visual Studio for Mac as my IDE. Before you start yelling, I love VS Code too, I use it for everything other than .NET Web API development. The built-in dev web server, class/ controller file generation, project generation, etc. is just a simpler and faster experience than hand typing everything via terminal. Don't hate. Moving on.
Environment
This walkthrough will be built on macOS. However, no reason you can't follow along on Windows as well.
The code for this article can be found in the following GitHub Repo. The repository will contain a dedicated directory for each article in the series.
Tools
-
- As of March 2023, installing Visual Studio for Mac will also install the .NET 7 SDK, which is not LTS. So we'll manually download and install the [.NET 6 SDK](https://dotnet.microsoft.com/en-us/download/dotnet/6.0) to use on this walkthrough.
macOS
Creating Project
Let's get started creating our project.
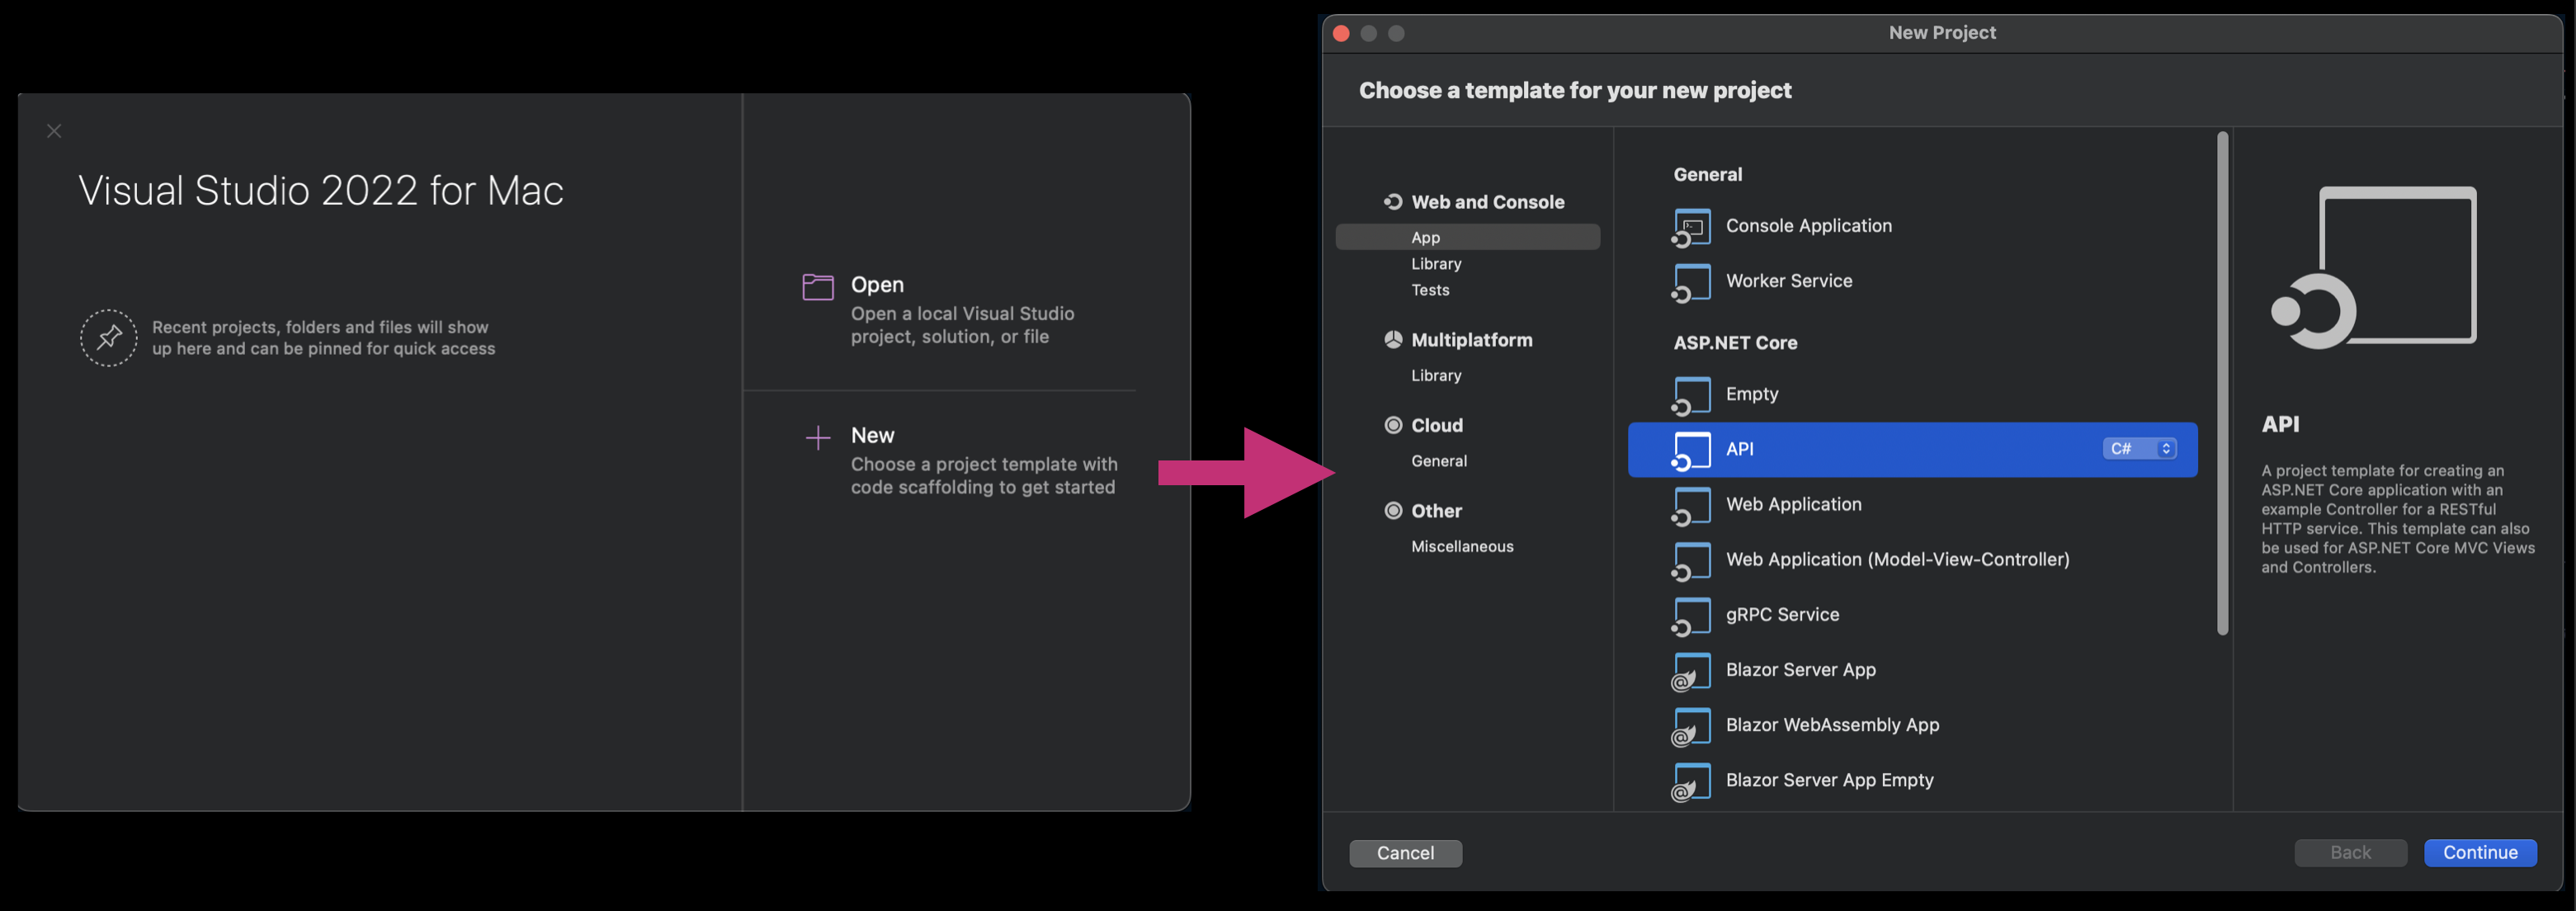
Start up Visual Studio for Mac and select the New project button.
We'll choose the "Web and Console" > "App" category and select the API (C#) template and click Continue.
The next step of the project wizard will prompt you to select the Target framework. Again, we're sticking with .NET 6.0. For the Advanced settings, we'll select the following options:
No need for HTTPS for this walkthrough.
Enable the use of controllers. We'll explore the Minimal API design approach in later articles.
Enable OpenAPI support. We'll use the UI-based OpenAPI spec AKA Swagger documentation tool.
Enable top-level Statements. I also build in Python from time to time, so the fewer brackets the better. This is a recent feature available in C#10.
Click continue to move on.
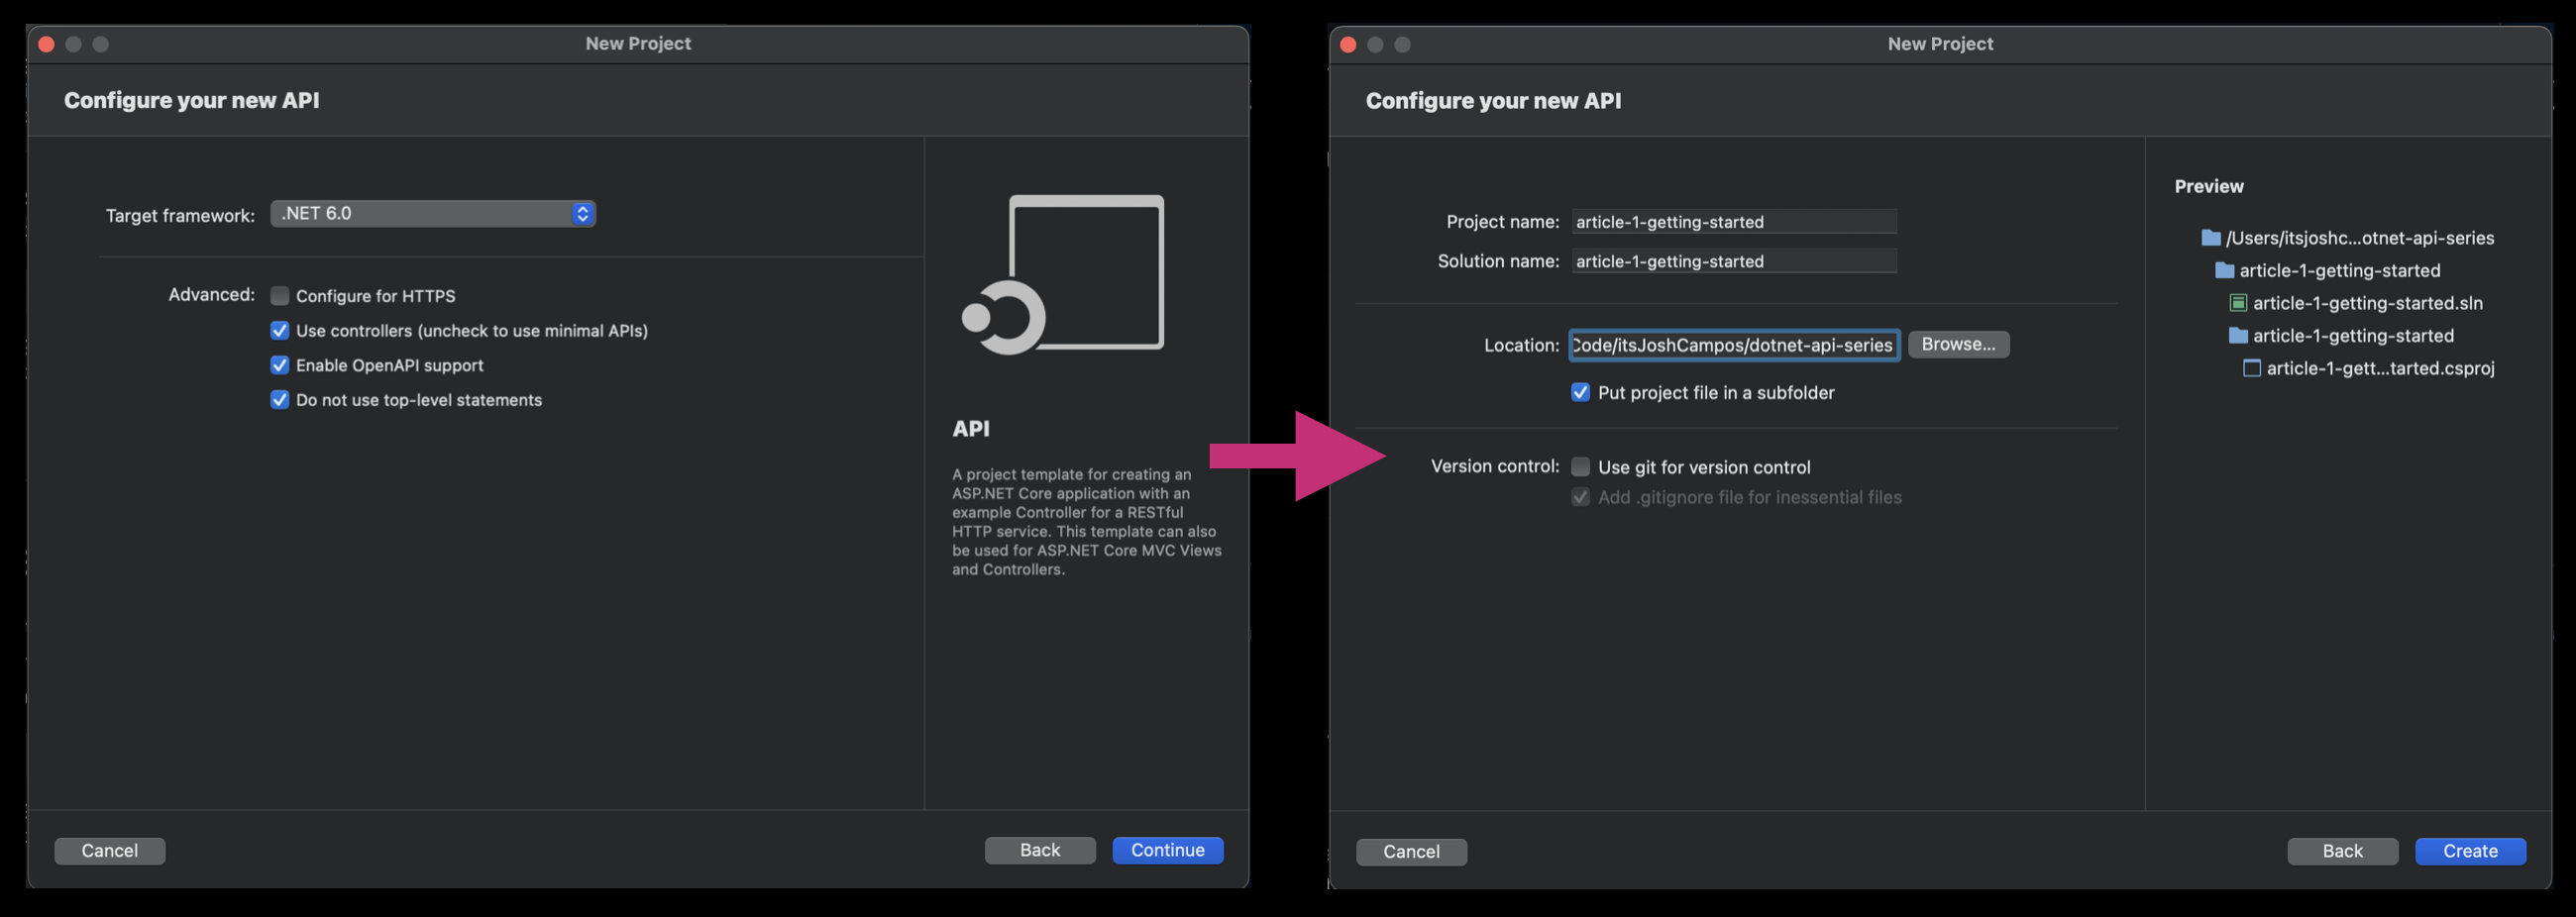
Choose your local directory for the project and leave the project in a subfolder to keep it organized.
Click Create.
Running the Project
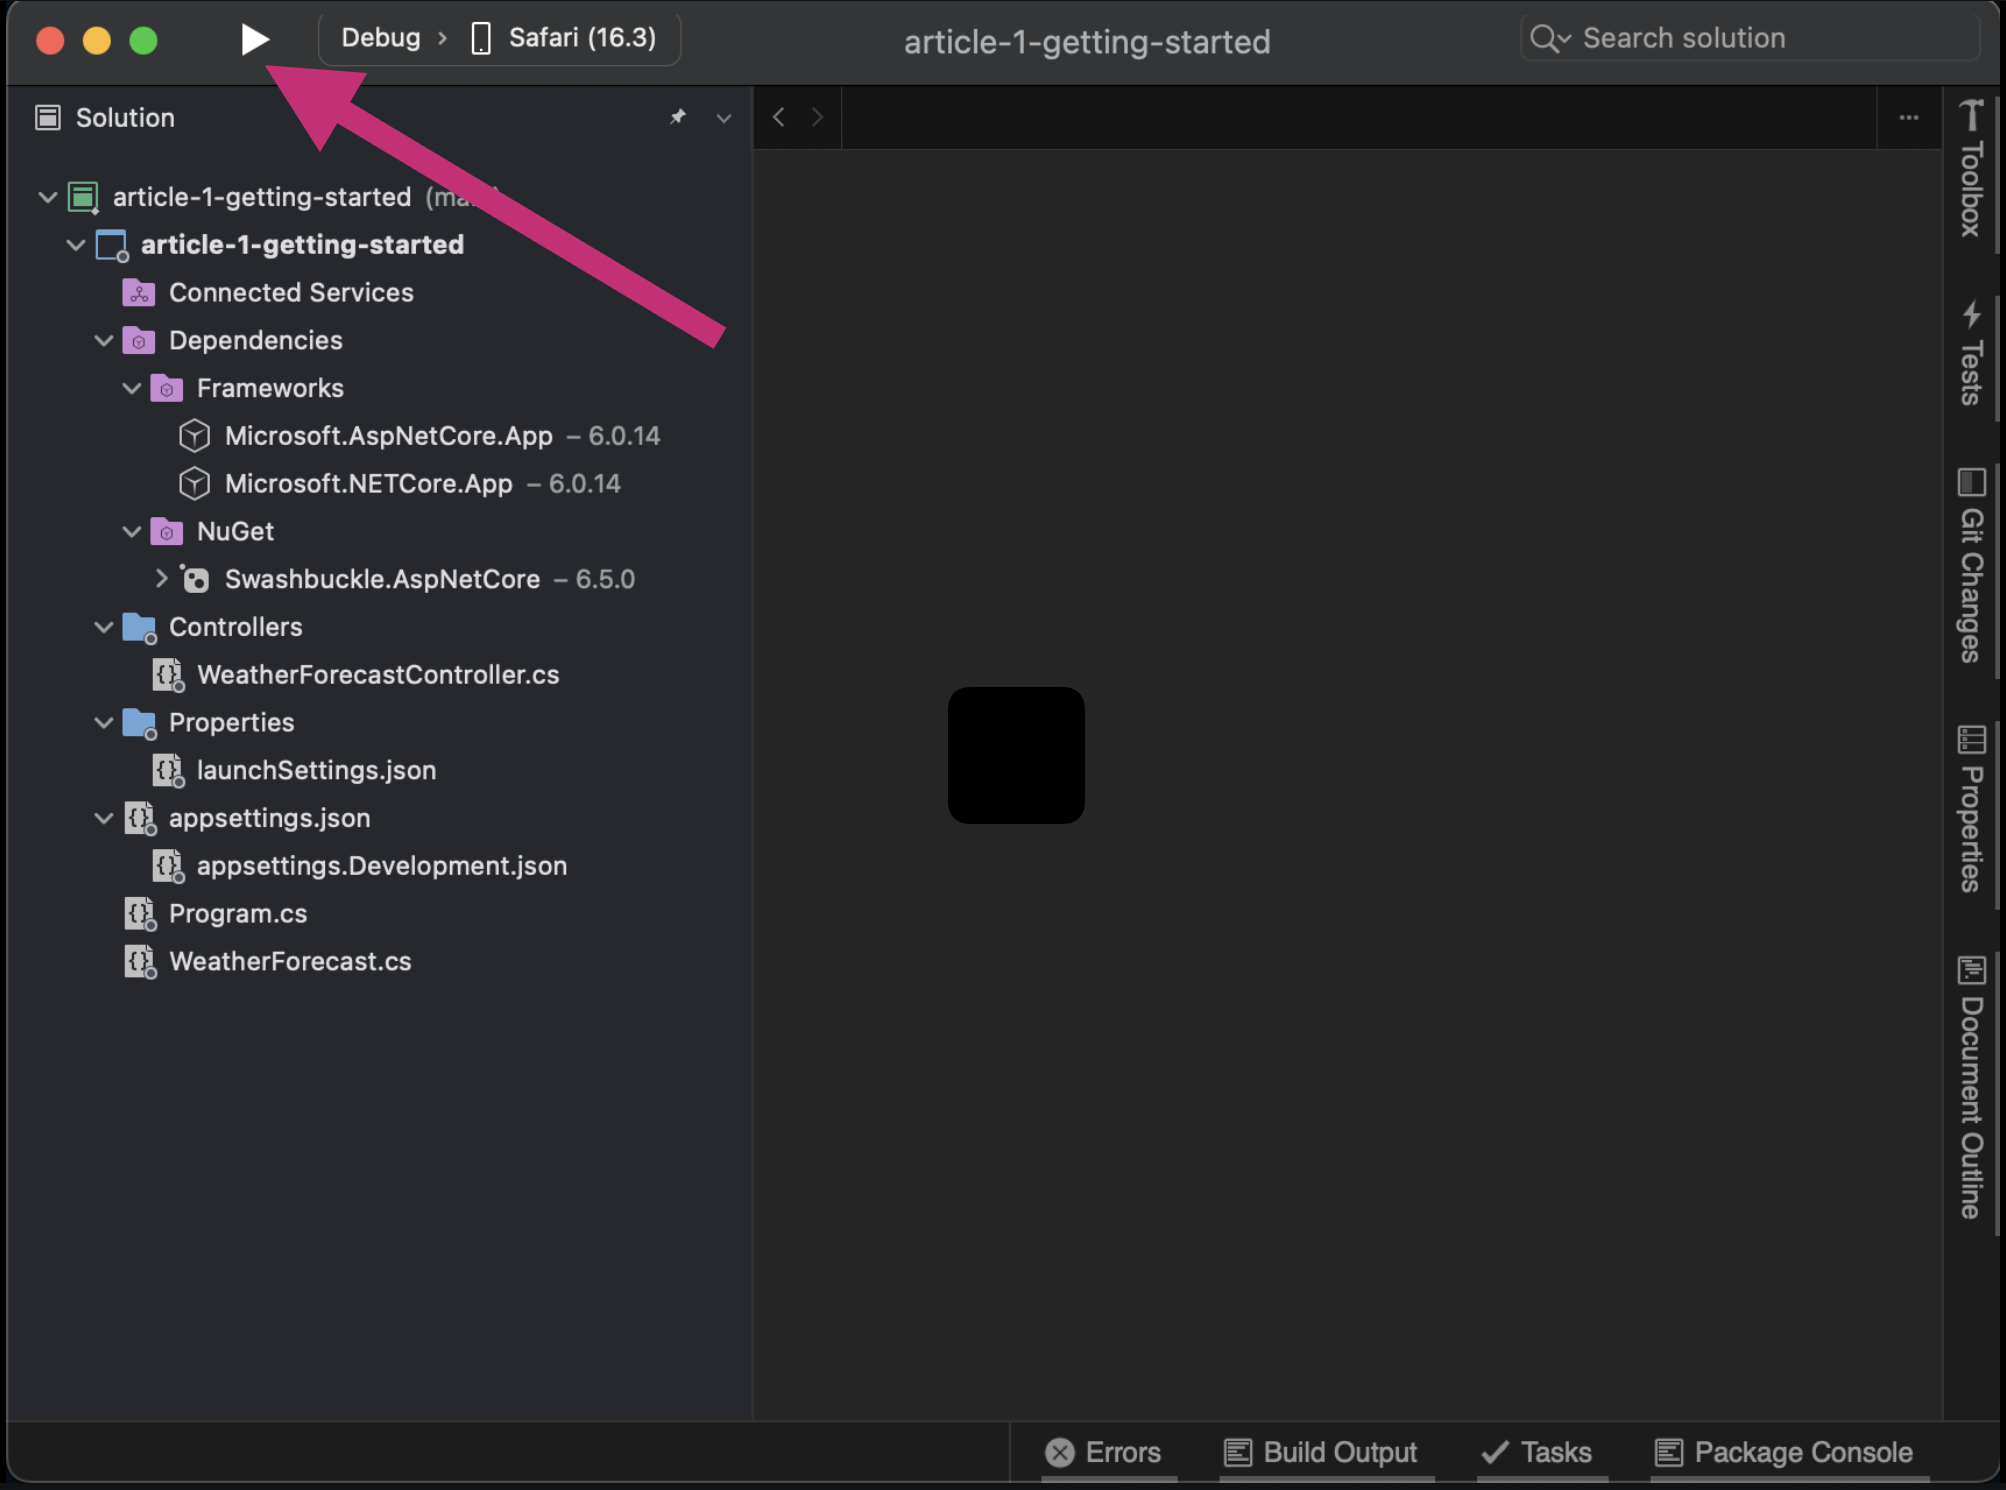
The default project will include an example WeatherForecast.cs class and the WeatherForecastController.cs controller file.
You should see a window with the directory structure looking just like the image below. Click the Play icon in the toolbar to run the default project.
Starting up the project will do the following:
Load all dependencies listed in the Dependencies folder, specifically Nuget, the .NET package manager.
Once all packages are downloaded Visual Studio will build the project producing compiled executable files to run.
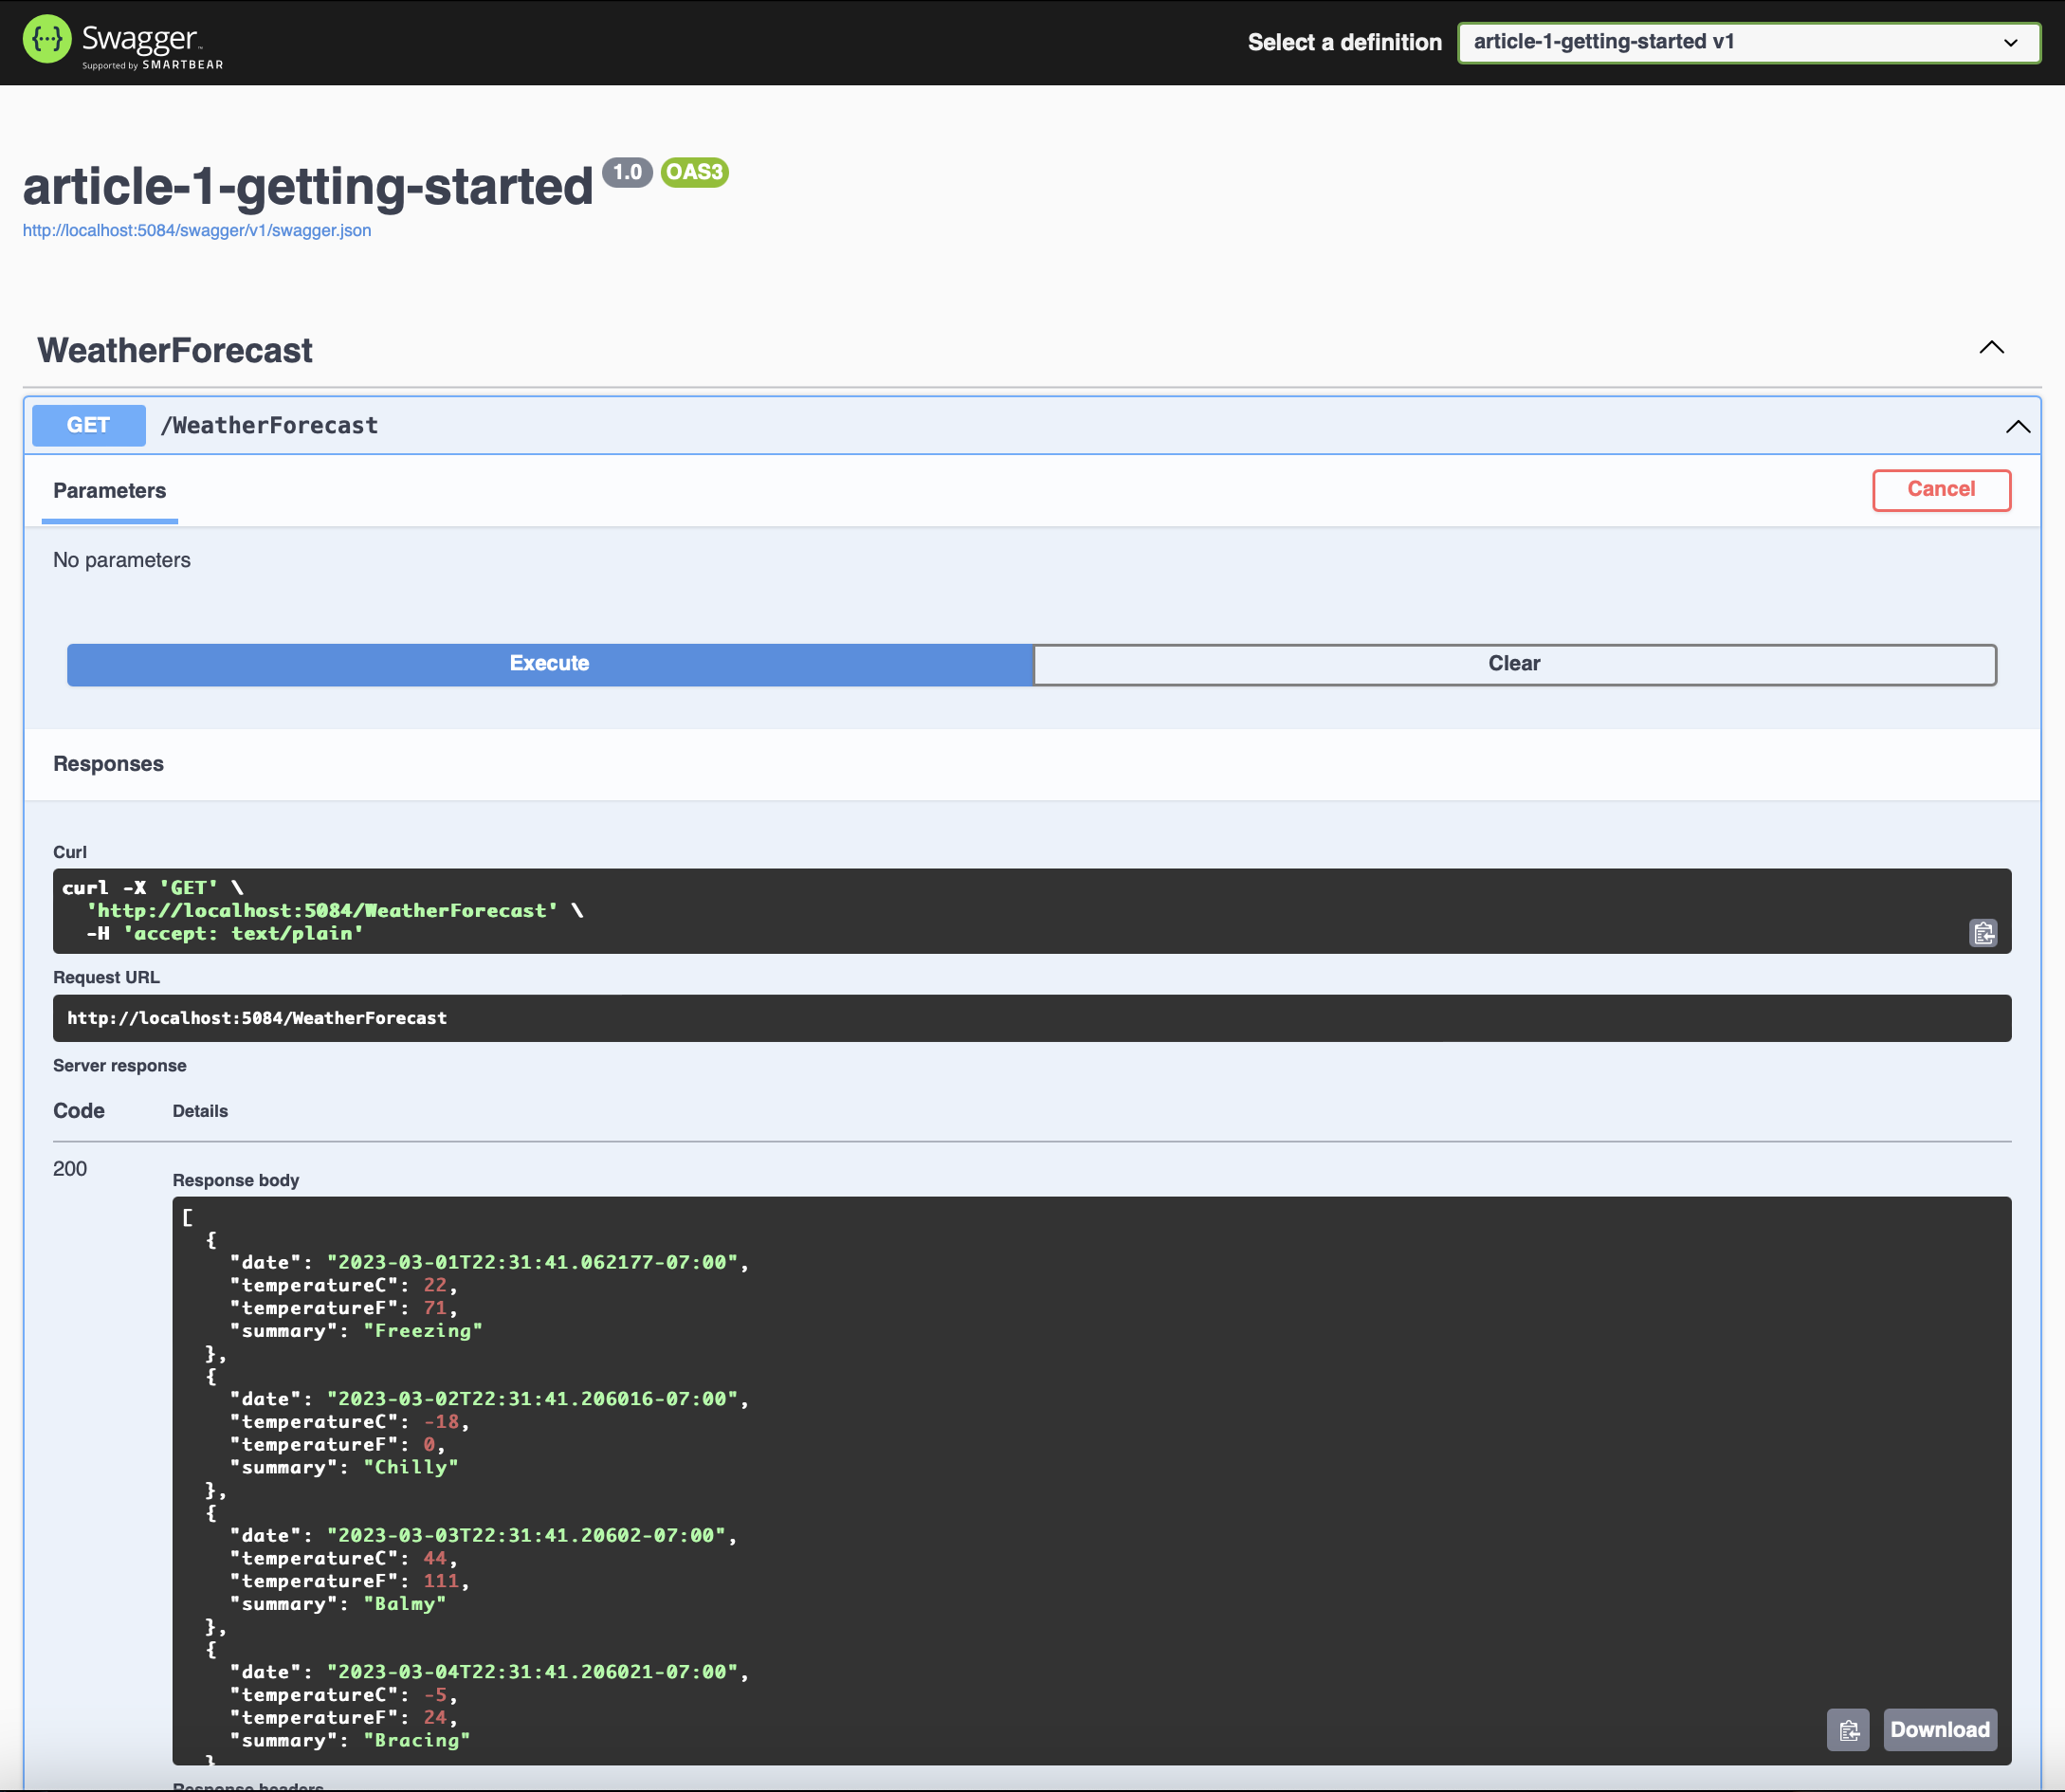
Visual Studio will start up your default browser using the applicationUrl specified in your launchSettings.json file. The JSON code below is a sample of my project. The application started up automatically using the URL: http://localhost:5084 and added the launch path: swagger to automatically load the OpenAPI (Swagger) web page.
...
// Sample from Properties > launchSettings.json

...

  "profiles": {
    "article_1_getting_started": {
      "commandName": "Project",
      "launchBrowser": true,
      "launchUrl": "swagger",
      "applicationUrl": "http://localhost:5084",
      "environmentVariables": {
        "ASPNETCORE_ENVIRONMENT": "Development"
      }
    },

...
The Swagger UI tool is building an XML file based on the OpenAPI specifications interpreted in your project. You can run the example WeatherForecast endpoint via the UI or copy the CURL statement if you want to hit the endpoint from your terminal.
That's all for now, getting started with a .NET 6 Web API project. Click the square icon (where the play button was) in the Visual Studio toolbar to quit the project.
Future articles in this series will cover further configurations regarding security, database connections, and more.