Full Stack Data Dev.
Introduction
The previous article reviewed how to set and read environment variables. We'll use that knowledge and set up an API Key as an environment variable for authorization in a FastAPI project. Keys are not a variable you want to check into your code repo, so environment variables are a perfect place for them.
An API Key serves two main purposes, a method of identifying the caller or requestor of the API Service if you're assigning keys and also controlling access to the API Service. It is a simple method of security to protect API resources.
Code for this example can be found here - API Key Project Repo. The README provides startup steps.
Setup an API Key Environment Variable
For this walkthrough, we will store the API Key in a .env file.
# .env file

API_KEY="my file key"
API Key Middleware
FastAPI will require some middleware in order to process the key and validate it. We'll create a new file auth.py to host the key validation middleware. Let's review the imports in the file.
First off, we're importing the class Settings() and get_settings method which will serve as a cache. These are dependencies for our environment variables. The cache will hold the environment variables read from our .env file.
Additional FastAPI imports are required, APIKeyHeader and Security in order to validate API Keys coming in through the header. The Depends function will load our dependencies like the Settings() cache for our API Key.
The starlette and HTTP Exception imports are used to return forbidden responses and statuses when the API Key is invalid or not included.
# Imports in auth.py file

from config import Settings, get_settings

from fastapi.security.api_key import APIKeyHeader
from fastapi import Security, HTTPException, Depends
from starlette.status import HTTP_403_FORBIDDEN
To utilize the API Key, the caller or requestor will be required to include the API Key in the Request Header. The API Key will need to be included in the header for all secure requests in our API. The header name, as shown below, is named access_token.
api_key_header = APIKeyHeader(name="access_token", auto_error=False)
The next step is the validation process. When the header is not included or is invalid, then a 403 status is returned with the message: Could not validate API Key.
Valid API Key requests are forwarded to the original route.
async def get_api_key(api_key_header: str = Security(api_key_header)):
    if api_key_header == config_env["API_KEY"]:
        return api_key_header
    else:
        raise HTTPException(
            status_code=HTTP_403_FORBIDDEN, detail="Could not validate API KEY"
        )
The entire middleware code is shown below:
# auth.py

from .config import config_env
from fastapi.security.api_key import APIKeyHeader
from fastapi import Security, HTTPException
from starlette.status import HTTP_403_FORBIDDEN

api_key_header = APIKeyHeader(name="access_token", auto_error=False)

async def get_api_key(api_key_header: str = Security(api_key_header)):
    if api_key_header == config_env["API_KEY"]:
        return api_key_header
    else:
        raise HTTPException(
            status_code=HTTP_403_FORBIDDEN, detail="Could not validate API KEY"
        )
Lock Down Routes
The app.py file will require two new imports to secure the API endpoints. We are importing the APIKey class and auth utility file we created.
# New Imports for app.py
from fastapi.security.api_key import APIKey
import auth
To utilize this middleware in our API, we will assign an API Key dependency to secure our routes. We will include the validation step as a parameter in our routes method. The API Key middleware is a dependency call to auth.get_api_key that is executed before executing the endpoint.
The first route listed below is using the API Key dependency in its route method. Before executing the endpoint, the API Key validation step is performed. If it does not pass this validation sequence, the 403 response is returned. If the API Key validation is successful, the route endpoint will execute and return the JSON body shown below.
The second route in the example is not locked down. The route can be executed without providing an API Key.
# Routes in the app.py file

# Lockedown Route
@app.get("/secure")
async def info(api_key: APIKey = Depends(auth.get_api_key)):
    return {
        "default variable": api_key
    }

# Open Route
@app.get("/open")
async def info():
    return {
        "default variable": "Open Route"
    }
Using API Key in Swagger
With the code updates complete, let's see how this works in Swagger.
Start up the server.
uvicorn app:app --reload
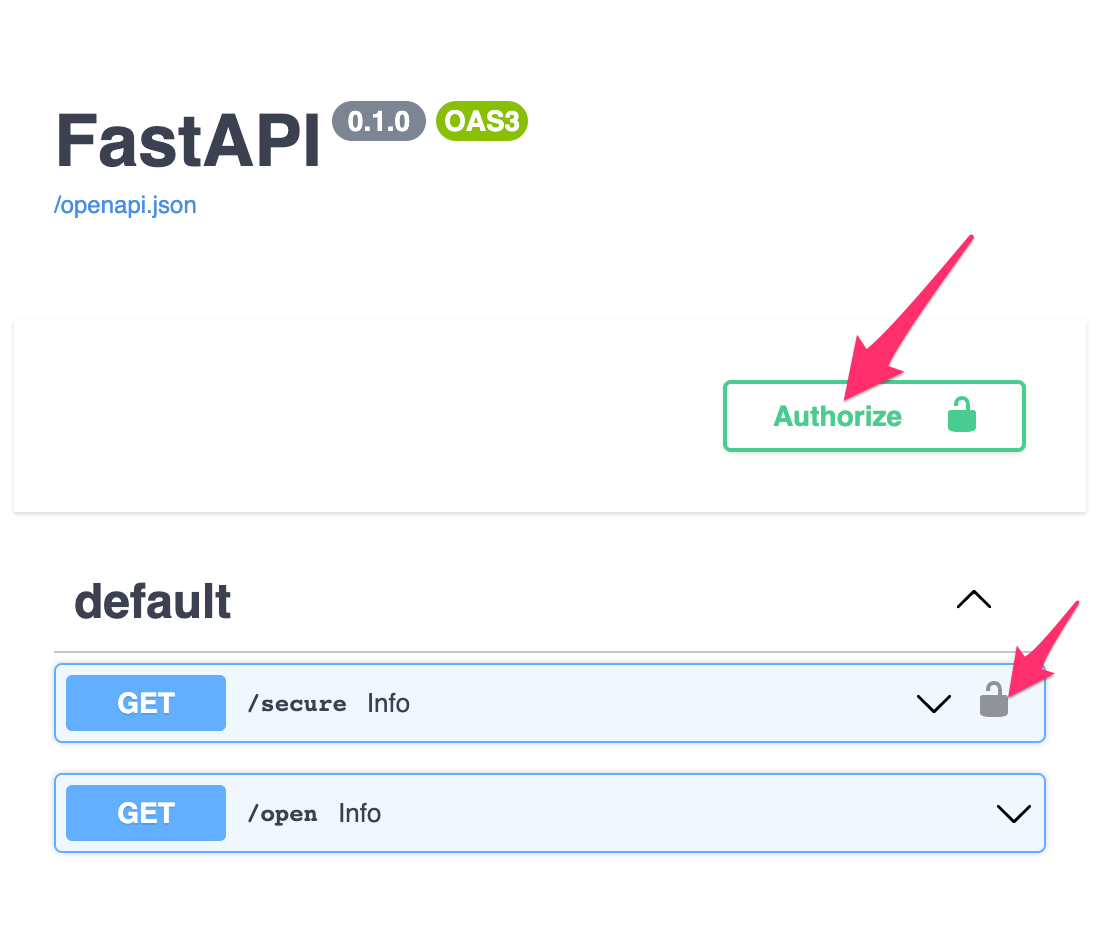
Swagger now has two new UI features.
The two default routes are listed, only one has the lock icon assigned. The
/secureroute will require an API Key to be provided and validated before returning API resources.
If you execute the route without providing a valid API Key you will be denied access. In the screenshot below, no API Key was included in the header request and a403 Forbiddenresponse was returned.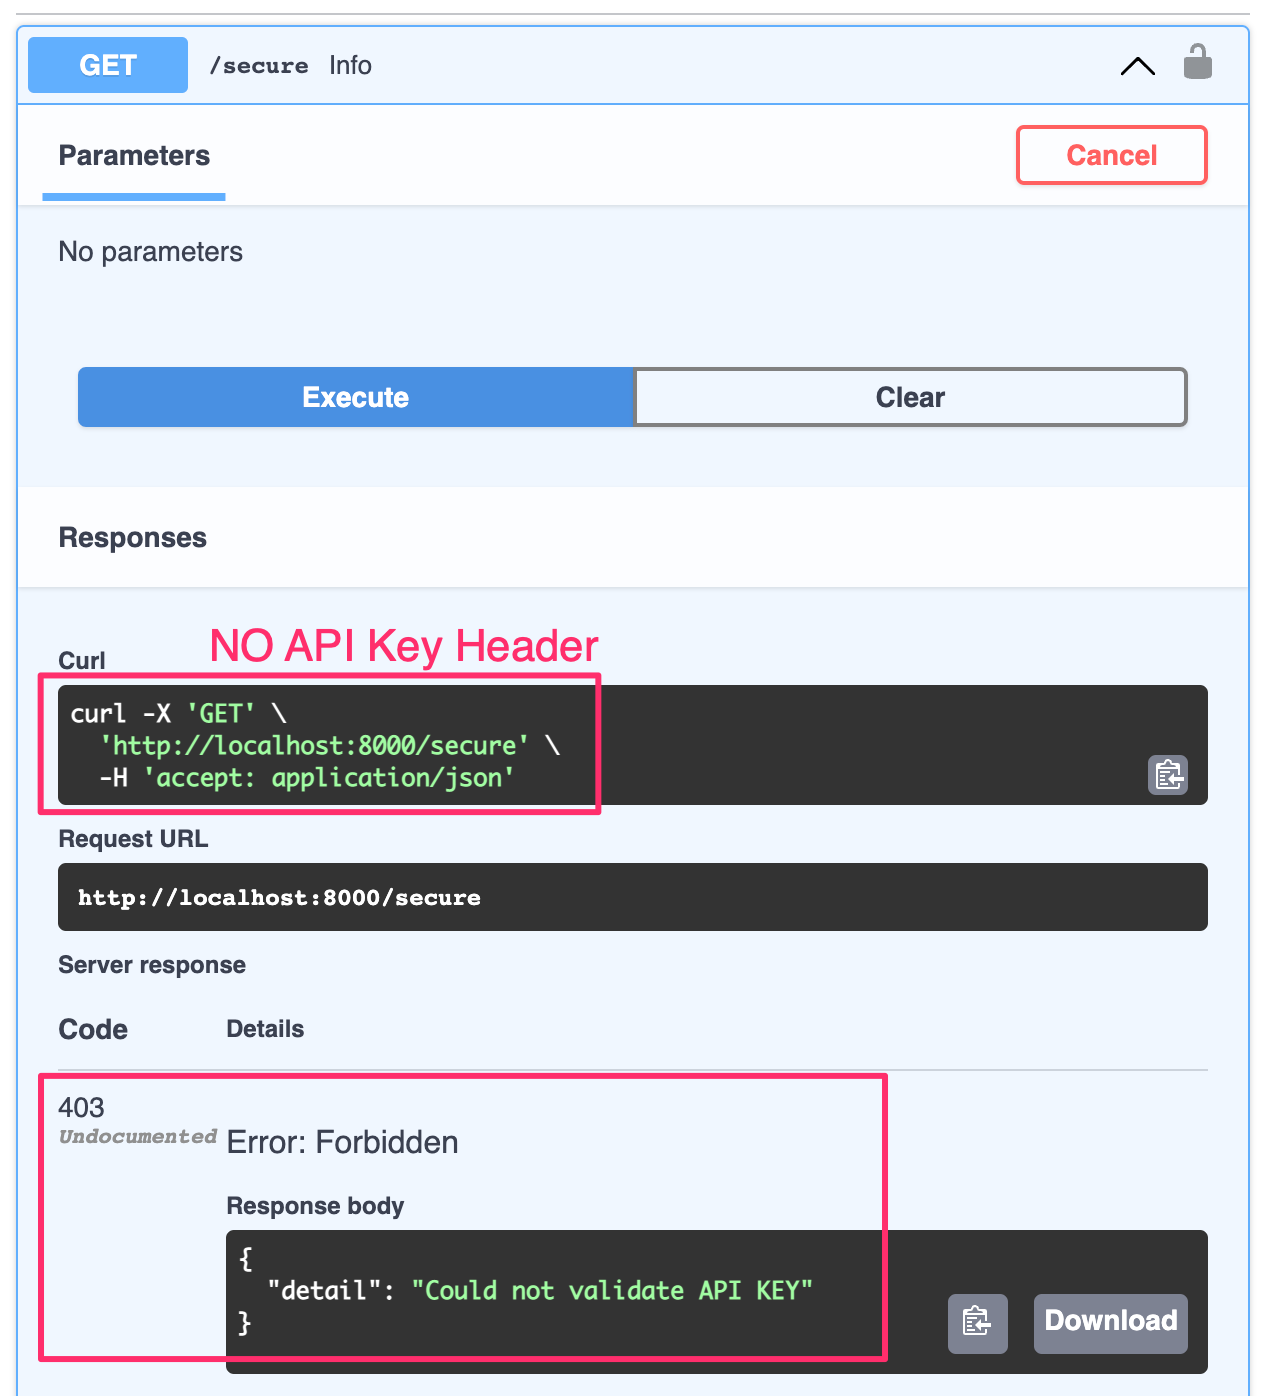
The green Authorize button is the next new feature. You can click on this to enter your secret API Key. This key will now be sent as a header to your API for validation with each request.
Enter your API Key exactly as it exists in your.envfile.
Click Authorize and close the window.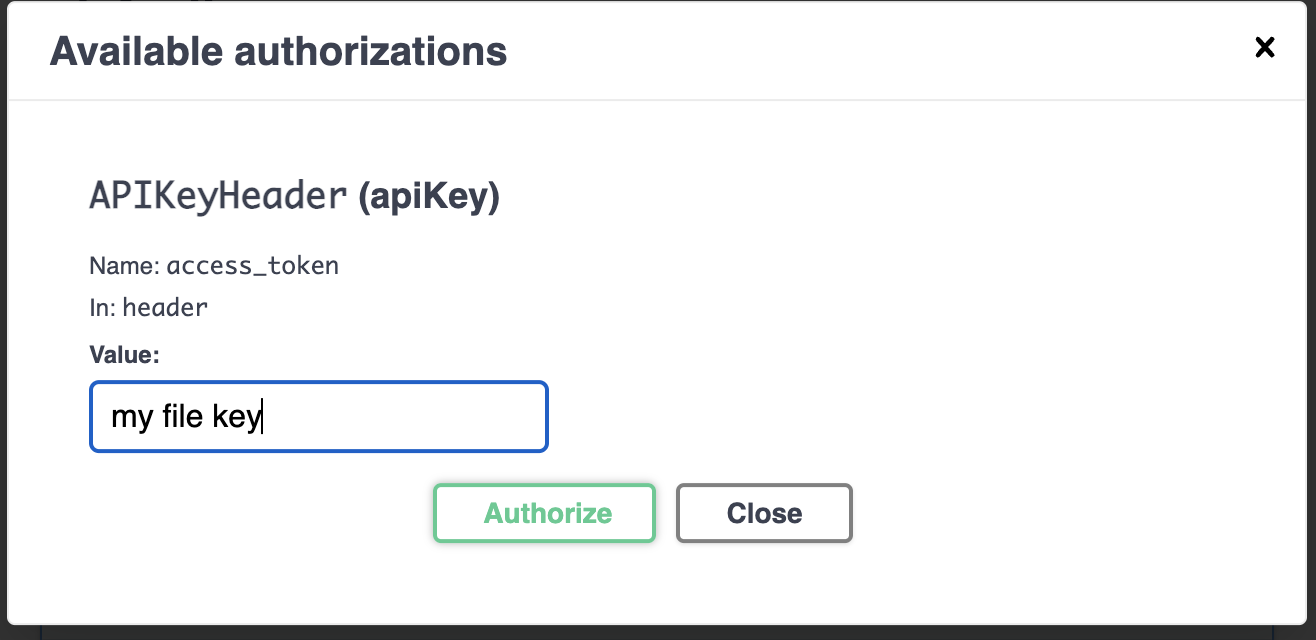
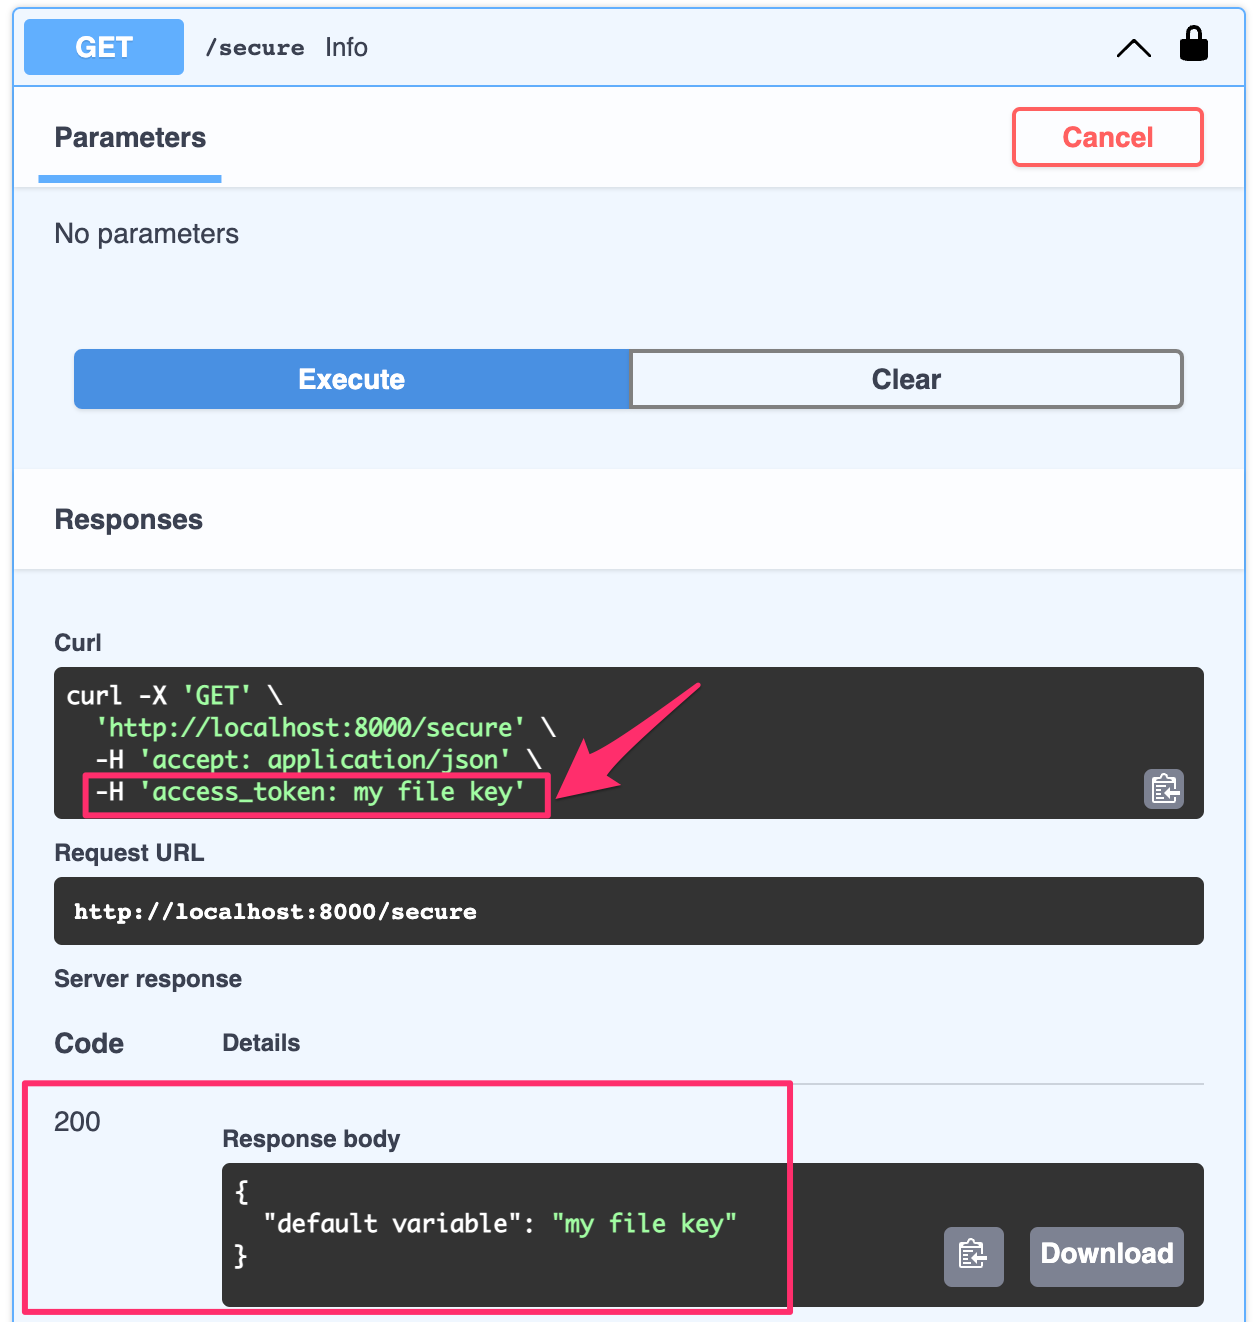
If you re-execute the route now that you entered your API Key, you will receive a successful response and see that your API Key was included in the request's header.
End
You now have a working API Key Middleware setup for a FastAPI Project. This example was using a plaintext key but additional steps to "productionize" would be to encrypt the key and add a step to decrypt the key in your auth.py utility file. HTTPS must always be enforced when dealing with keys being sent over the wire.
Individual User Auth can also be applied by utilizing JWT and will be covered in later articles.